

Click to Visit These Popular Posts


Showing posts with label Bloggers. Show all posts
Showing posts with label Bloggers. Show all posts
25 August, 2014
Behind the Scenes at Confessions of a Plate Addict


10 February, 2013
Want to Know How I Found My Style? Find Out at From My Front Porch to Yours!
 I am so excited today because I am the guest blogger with Pamela at From My Front Porch to Yours for How I Found My Style Sundays! I feel so honored to have been invited to her lovely blog to tell you a little bit about myself and how my Country French style came about!
  You may already know Pamela since her wonderful blog was featured just this month in Romantic Homes magazine! And…her blog is indeed one to make you swoon!
  If you haven’t already, you will definitely need to check out her lovely laundry room…complete with chandelier…that she made over for just $100! Talk about swoon!
 And take a look at her Country French dining room! Don’t you love it? And she found this chandelier for a song at a yard sale! Unbelievable! And there is lots more to see!
So please head over to Pamela’s lovely blog From My Front Porch to Yours to discover how I found my style and have a peek into her beautiful home! I think you will find yourself spending some time there admiring her style! I know I do!

Subscribe by email or in a reader
Also find Confessions of a Plate Addict on:
08 November, 2012
Need Some Inspiration? Here Are 50+ Fall and Thanksgiving Tablescapes from Hometalk!
 Do you know about Hometalk? It’s a great place to share ideas and to be inspired! I have collected over 50 fabulous tablescapes from the talented member of Hometalk to help you get a head start on your Thanksgiving holiday table! Just head on over here to be inspired! There’s something there for everyone. Enjoy! And while you are there, join us at Hometalk if you have not already!
 Thanks for stopping by! I hope you enjoyed a little peek at our Thanksgiving tablescapes! Please visit these wonderful bloggers and their beautiful blogs to see what they are up to and to find a list of this week’s participants!
Under the Table and Dreaming for the Sunday Showcase Party
Thrifty Decor Chick for Before and After Monday
Boogieboard Cottage for Masterpiece Monday
Between Naps on the Porch for Metamorphosis Monday
The Stories of A2Z for Tutorials and Tips Tuesday
Coastal Charm for Nifty Thrifty Tuesday
A Stroll thru Life for Tabletop Tuesday
Cedar Hill Ranch for Cowgirl Up! on Tuesdays
My Uncommon Slice of Suburbia for Tuesday's Treasures
Savvy Southern Style for Wow Us Wednesdays
DIY by Design for Fall into Fall
DIY Showoff for the Fall Festival
Between Naps on the Porch for Tablescape Thursday
The Shabby Creek Cottage for Transformation Thursdays
No Minimalist Here for the Open House Party on Thursdays
Stone Gable for Tutorials. Tips and Tidbits on Thursdays
My Romantic Home for Show and Tell Friday
French Country Cottage for Feathered Nest Friday
2805 for Potpourri Friday
At the Picket Fence for Inspiration Friday
Common Ground for Vintage Inspiration Friday
The Charm of Home for Home Sweet Home Friday
Craftberry Bush for Happy Hour on Saturdays
Funky Junk Interiors for Saturday Nite Special
See you next time! A la prochaine!

Want to see more?
Subscribe by email or in a reader
Also find Confessions of a Plate Addict on:
29 July, 2012
Cowgirl Up! Christmas in July...A Recap and a Thank You!

 I have been so inspired by the posts during this week from my fellow bloggers at Cowgirl Up! and their guests that I want to take a minute to recap the fabulous projects. Here they are, just in case you missed any:
 1. Book Christmas Trees from Korrie at Red Hen Home
2. Instagram Ribbon Spool Ornament from Amanda at The Ivy Cottage Blog
3. French Script Cones from Anita at Cedar Hill Ranch
4. Vintage Christmas Card Pillow from me…Debbie…here at Confessions of a Plate Addict
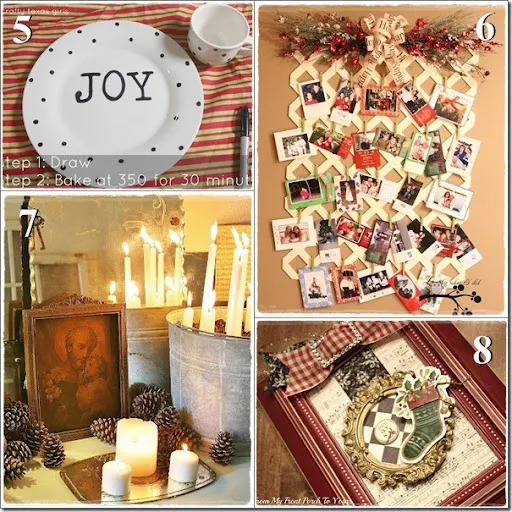 5. Sharpie Plates from Samantha at Crafty Texas Girls
6. Lattice Christmas Card Display from Missy at Lookie What I Did
7. Old World Christmas from Linsey at The Farmhouse Porch
8. My Addiction to Frames from Pamela at From My Front Porch to Yours
And a big thank you to all of you for your visits, sweet comments and inspirational posts! I found so many things to pin! It has been fun! Thanks for joining us for Christmas in July!
28 July, 2012
Cowgirl Up! Christmas in July...My Addiction to Frames
 |
| Hi my name is Pamela and I am from over at From My Front Porch To Yours. I was so honored when I was asked to participate in Christmas In July with all these fabulous ladies! I pondered for weeks what I was going to share and well after several treasure hunting trips it dawned on me! |
 |
| I LOVE frames! I am addicted to frames and use them all around my house. |
 |
| I can always manage to work a frame in some where!:) |
 |
| One project I do every year is to make frames as gifts for teachers or whomever. I shop for frames at HobLob when they are 50% off. I stock up thru out the year. Also at the end of the holiday season I always take part in Michaels clearance. I can find so many beautiful ribbons, stickers, chip boards, and embellishments on sale that I have to tell my self to stop and not put another thing in my cart!;) You will also need ModgePodge, craft glue and a hot glue gun plus whatever else you can imagine! |
 |
| I always make such a huge mess. Most of the time the kitchen table is out of commission for two days once I get started. My boys don't mind because that means picnic time in the living room!:) |
 |
| I never really now what I am going to end up with. |
 |
| Most of the time I can find the little mini gold frames in the Michaels bargain section. I love these frames because you can do so many things with them. I have even made fridge magnets with them. |
 |
| I loved this chip board box so much and hated the thought of throwing it away so instead I used it to create a layered shadowbox of sorts. |
 |
| I used a white paint pen and covered up the wording at the top of the box and made it look like more snow. Then I used a vintage scene from a card I had to make it look like you are peering thru the window at Santa. Then I used some chip board pieces to cover up the other areas on the box that needed covering. This frame is one of my favorites. |
 |
| I know it is only July but for me it is never to early to get a jump start on decorating and crafting for the holidays! It will be here before we know it and I hope that I was able to inspire a few projects out there. Thanx for stopping by! Be sure to stop by all these fabulous ladies if you missed any of the projects shared this past week! Amanda-The Ivy Cottage Blog Kori-Red Hen Home Anita-Cedarhill Ranch Debbie-Confessions of a Plate Addict Samantha-Crafty Texas Gals Missy-Lookie What I Did Linsey-The Farmhouse Porch |


Back to me...Debbie at Confessions of a Plate Addict...to say a great big thank you to all of you have been celebrating an early Christmas with us by stopping by to check out our projects or by showing us yours at the Cowgirl Up! Link Party! It has been so much fun to get a little head start and enjoy some Christmas inspiration and thoughts of cooler weather! I also want to send my thanks to the ladies at Cowgirl Up! for including me and a special thank you to Anita at Cedar Hill Ranch for choosing me as her guest! It's been fun! I hope you enjoyed it, too!
27 July, 2012
Cowgirl Up! Christmas in July...Old World Christmas

Howdy gals! Linsey here from The Farmhouse Porch. My project for "Christmas in July" is sort of a hodge podge mix of crafting/art/home decor. You guys know that aging things and giving them patina is my thing. Buying all new is so sterile, buying only old stuff can look stale. But when you mix the two it looks great. The problem with buying old stuff is that sometimes the real deal is really, really expensive. Take religious antiques for example. If you were to try to purchase this antique 24 inch oil painting of St. Jerome here, expect to pay...

$2,500.00
whoa.
The reason I bring up religious antiques is because I love the look of an old world, European church at Christmas. I happened upon a little saint picture at the dollar store and bought it in the hopes that I could age it to get that "religious artifact" feel. I also set up some simple displays around the picture on my entry table to get the entire look going.
Supplies
dollar store candles

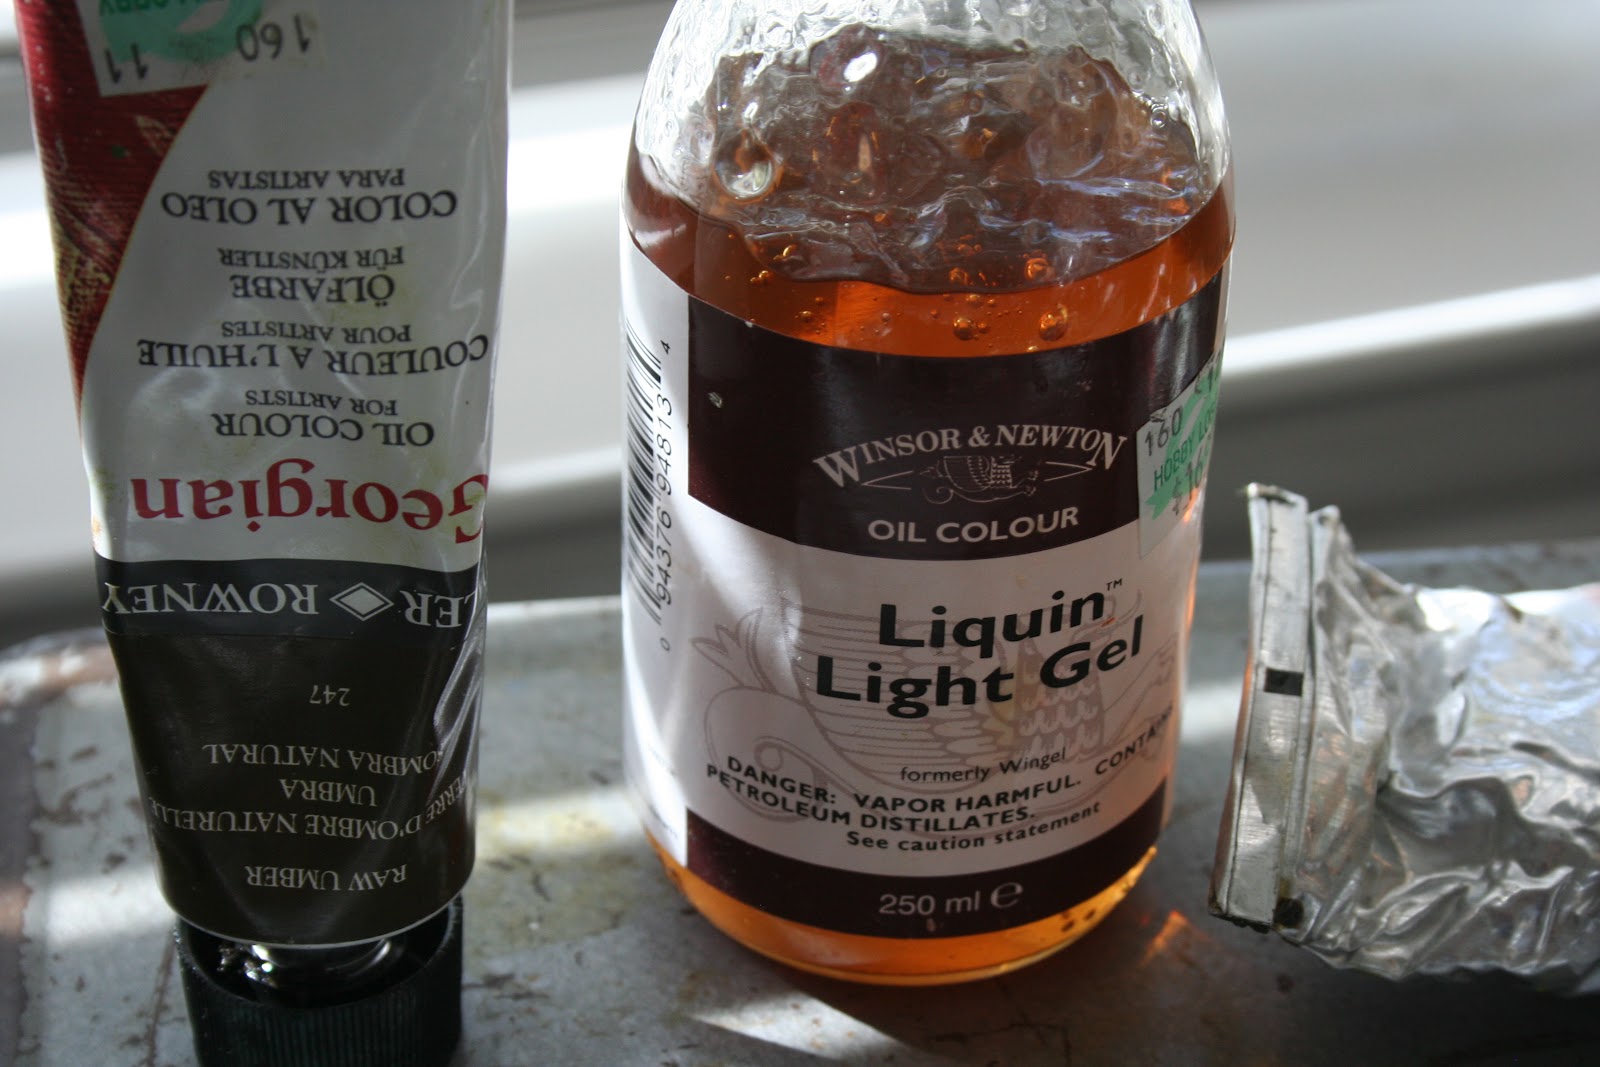
Liquin or other glazing medium, this is what I use to thin my oil paint. I like oil paints rather than acrylic because they just look more "aged" in color and patina to me. Raw umber works well for aging, but adding layers of different browns gives the best patina.
Here is the little 10x12" picture I found at the dollar store.

Before
The colors are too bright and flat.

Here is the picture after one application of glaze plus paint. I am holding it up to the light of the window so that you can see it better. I started by applying it with a balled up paper towel.

Here it is after applying more and more glaze/paint, try to use a few different brushes (like the one with bristles in a fan shape). This will add more layers of brushstrokes. It sounds like lots of work but honestly this all took about 10 minutes.

Here it is after. Another cool thing about liquin is that it makes the oil paint dry VERY fast.

I had purchased this old little beat up frame at an antique shop for about $4 a month ago. At first I was trying to hang it on my mirrors in the background and then I had a lightbulb moment...it's perfect for the little "painting"!!!

To add to the old European church look, I filled a galvanized bucket with dirt.Well actually, I filled it with sand first- from the backyard. Then I smelled something that made me gag. Need I continue the story folks? You guessed it...yellow sand from my pup (I can't believe I'm telling you this. I told myself it was my little secret)! So I chucked the sand, washed profusely, and filled the bucket with CLEAN dirt (is that an oxymoron?).
In the end I think it turned out very pretty though...



This is sort of an understated Christmas look. I love the glitz and glam and glitter of Christmas, but a rustic, natural look can be a striking way to celebrate the "holy days" as well.
-Linsey
Please visit these other beautiful blogs for Christmas inspiration...

26 July, 2012
Cowgirl Up! Christmas in July...A Lattice Christmas Card Display
Christmas in July Special Event

I am so happy to join you for the Christmas in July event sponsored by those Texas gals at Cowgirl Up link parties. This is Missy at Lookie What I Did. We had just arrived to our new home in Calgary, Canada when Samantha from Crafty Texas Girls asked me to participate. Since my craft room is still in boxes, I was forced to create something that was simple and appropriate for the Christmas holidays. The inspiration came to me at Home Depot last week when I spotted a sheet of lattice in the back of the store. I hope you enjoy this simple, clever and cheap way to display all of those greeting cards you receive during the holidays. Here is how it was made.

Supply List
Lattice - Size of your choosing
Clothespins
Spray Paint for Lattice
Spray Paint for Clothespins
Hot Glue Gun
Sandpaper for distressing clothespins
Decorative topper of your choice (use what you have from Christmas past)
3M Command Hooks and Picture Velcro Strips for hanging the finished lattice
Total Cost of this project was $20.00
Let's Get Started......
Home Depot cut a sheet of plastic lattice into two equal size pieces. The lattice used in this project cost about $10.00. I then went to Michaels and purchased two cans of spray paint and some clothespins. I chose a sage green and ivory for my colors because I plan to leave the lattice up year around, changing the topper for each season, so I wanted neutral colors (instead of bright red).


Start by laying the lattice out on paper and spray painting it. It took only one can to cover the entire piece and it dried very quickly.

I have always used boxes to spray paint clothespins. It's so much easier and the coverage is perfect.

Here are the clips after they have dried. I distressed them using a small sanding block. Just rough up the edges all around. This took less than five minutes for all of the clothespins.
Before Sanding

After Sanding

When all of the clothespins are distressed, you can lay them out on your lattice to see how you want them to look. I skipped every other row and hung them on alternating columns.


Now that you have them placed on your lattice, start hot gluing the clothespins.


Here are the clothespins hung on the lattice. You can see how I skipped a row and then hung the clothespins on every other column. I chose this layout so that the cards hanging on the pins would stagger each other rather than overlap.

For the topper I decided to use my Christmas tree decoration from last year!!
I simply layered the garland and created bunches on each end. The bunches were secured with cable ties.

Start by placing two of the same branches below....

Layering two different ones on top....

Then the third layer.....

Securing them with cable ties.....

It will look like this......

I took the same bow from my Christmas wreath last year and simply adhered it to the middle of the branches with floral wire.....

Ta daa......

I took some floral wire to adhered the branches to the top of the lattice. After this I simply used 3M hooks and velcro picture hanging strip to hang the finished lattice on the wall. You can use nails if you prefer. I used the heavy duty hooks for the top layer with the branches and for the bottom lattice I simply just used two 3M picture hanging velcro strips. You can find all of these at your local craft store.


It was time to grab some old Christmas cards (the only ones I could find) and display them.


I hope you have enjoyed reading this easy and fun way to display your cards. I can't wait to decorate it for the different seasons. I think this lattice will come in handy to display every day photos, school notes, birthday invitations, school work, etc. I'm not just going to store this in the closet and drag it out every Christmas. This is going to be a permanent stay in my house.
Merry Christmas.....in July
While you're in the Christmas spirit, please feel free to take a "Lookie" at some other Christmas crafts I created last year.....
Thanks for stopping by!!
Missy

Feel free to check out all of the blogs! Here are the links
Subscribe to:
Posts (Atom)