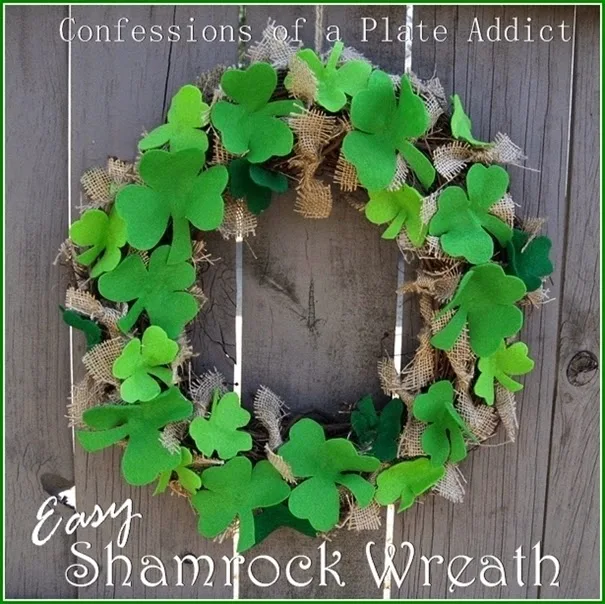
 My inspiration came from a lovely wreath from Consie at Atop Serenity Hill that I found here. She’s a fabulous artist and I …errr…am not, so I just made a few changes to better suit my
 Here’s what you will need:
- A grapevine wreath (about 15 inches)
- Approximately 50 strips of burlap measuring 1” x 6” (I just raided my scrap stash, but 1/3 of a yard of burlap will be more than enough.)
- Felt squares in three shades of green (1 square of light green, 1 of dark green and 2 of medium green)
- Print-out of the shamrock template found here
- Hot glue gun
- Jute twine (to hang the wreath)
- Tie the strips of burlap to the wreath, spacing them evenly throughout the wreath.
- Using the template, cut out the shamrocks in three different sizes. (I cut 5 large shamrocks in medium green, 5 medium shamrocks in medium green, 10 small shamrocks in light green and 5 small shamrocks in dark green.)
- Hot glue the shamrocks to the wreath, spacing them evenly throughout the wreath.
- Tie a loop of jute twine to the back of the wreath to hang it.
 I love the way the different shades of green felt add some depth to the look of the wreath, while the burlap adds lots of texture!
 And here it is…ready to let my home join in on the wearin’ o’ the green! Erin go Bragh!
Thanks for stopping by! Please visit these wonderful bloggers and their beautiful blogs to see what they are up to and to find a list of this week’s participants.
Under the Table and Dreaming for the Sunday Showcase Party , Thrifty Decor Chick for Before and After Monday , Between Naps on the Porch for Metamorphosis Monday , The Stories of A2Z for Tutorials and Tips Tuesday , Coastal Charm for the Show and Share Party , A Stroll thru Life for Inspire Me Tuesday , My Uncommon Slice of Suburbia for Inspire Me Monday, Savvy Southern Style for Wow Us Wednesdays , Common Ground for Share Your Style on Thursdays , French Country Cottage for Feathered Nest Friday , The Charm of Home for Home Sweet Home Friday , Craftberry Bush for the Inspiration Gallery on Friday, Tatertots & Jello for the Link Party Palooza on Fridays
See you next time! À la prochaine!
Also find me at…


Ta couronne est magnifique Debbie ! J'adore ! :-D
ReplyDeleteYour version came out just fabulous, Debbie! PS...you ARE an artist! Just look what you made!
ReplyDeleteAwww! Thanks, Consie! You are a sweetie! :-)
DeleteLoving the Shamrock wreath, it's as cute as can be!! I plan to try my hand at one this weekend. Thank you for sharing it!
ReplyDeleteKarri
Love it...I like the loose burlap ties. Would also look nice for a Valentine's version too...thanks for the tutorial!
ReplyDelete